Table of contents
Related Articles
Introduction
In order to deliver features with with ease, while minimizing the impact on the infrastructure and users, the deployment calendar becomes a very useful tool. It allows to visualize the planned deployments and show if one or more services will be impacted. It is recommended to do implementations based on a schedule pre-established by the enterprise to minimize impacts. It is also important to consider the interrupted services and the frequency of their deployments.
A change can have multiple deployment tasks. This is an advantage to plan deployments in multiple phases.
How to Add a Deployment to the Calendar
To add a new entry to the deployment calendar, you must enter the following information from a Change task:
- Enter a start date and time
- Enter an end date and time
- Check the Is a deployment box
- Choose the impact level between:
- None
- Degradation
- Interruption
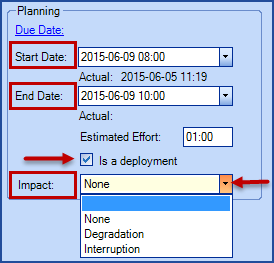
Add a Deployment Task to a Change Template
It is possible to add a deployment task to a change template. You only need to check the Is a deployment box and add an Impact.
The deployment task will be created along with the change. However, for the task to be visible in the deployment calendar, you need to add the start and end dates.
 Trick: Create a list that targets tasks and that searches for deployment tasks without dates to prevent you from forgetting them.
Use the following criteria:
- Is a deployment
- Operator - Equal
- Value - Yes
- Estimated Start Date
- Operator - Is empty

Deployment Task in an SR
In some contexts where Change Management is not used or in non-IT teams, there may be a need to use the deployment calendar to manage deployment tasks inside SRs. It works the same way in SRs as it does in Changes.
If needed, an on-demand option exist to activate deployment tasks in SRs. Contact our Service Desk to make the request and ask for the ServiceRequest.TaskDeployment.Enabled option.
Calendar Overview
Legend
The deployment calendar is colour coded by impact.
- No colour and crossed out: The task was cancelled
- Gray: No impact
- Orange: Service degradation
- Red: Service interruption
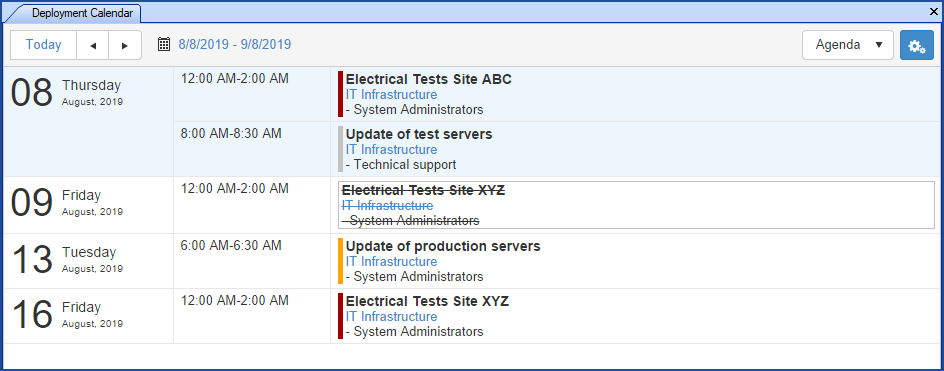

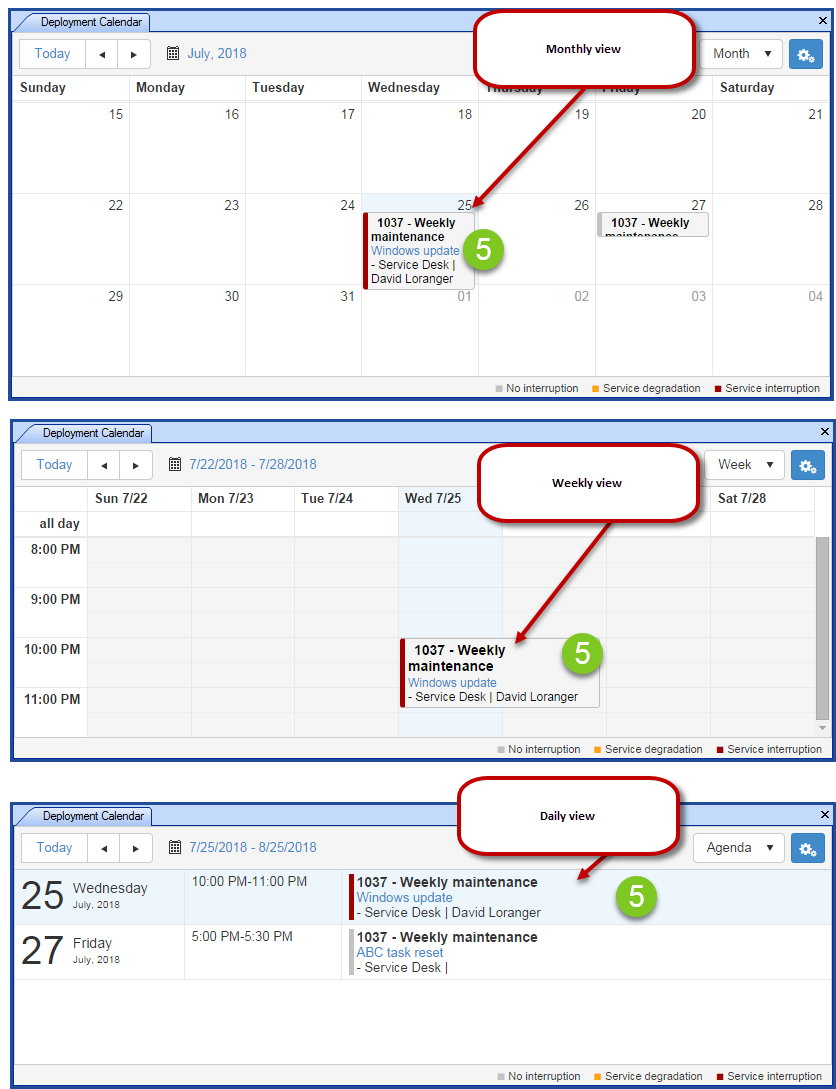
Calendar View
Several views are available:
- Agenda
- Week
- Month
Each of these views displays different information

Agenda
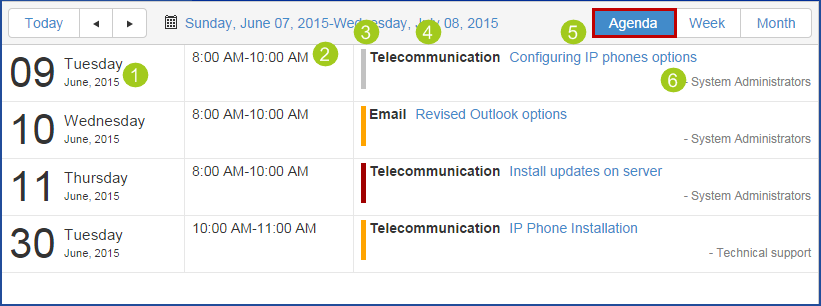
The Agenda view displays all planned deployments.
Here is the information displayed:
- Deployment date
- Deployment period
- Impact colour
- Impacted service
- Subject of deployment task
- Assigned deployment group
Week
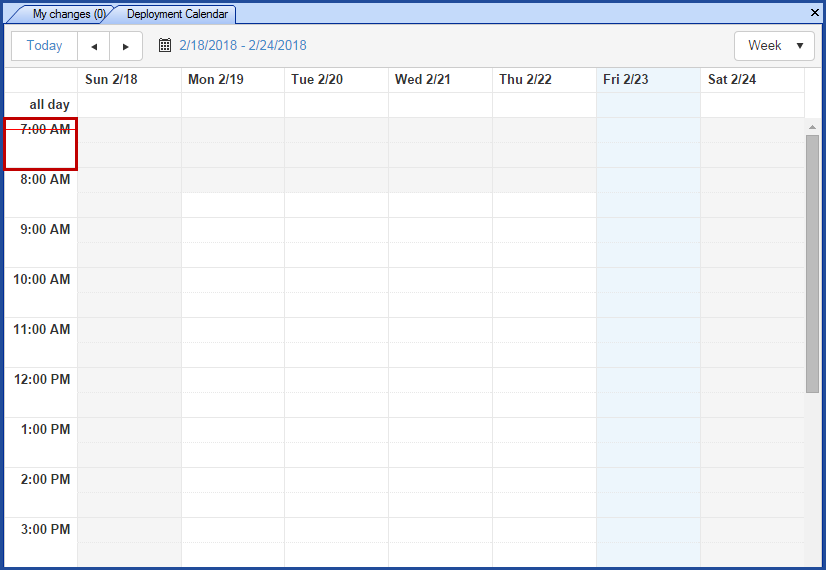
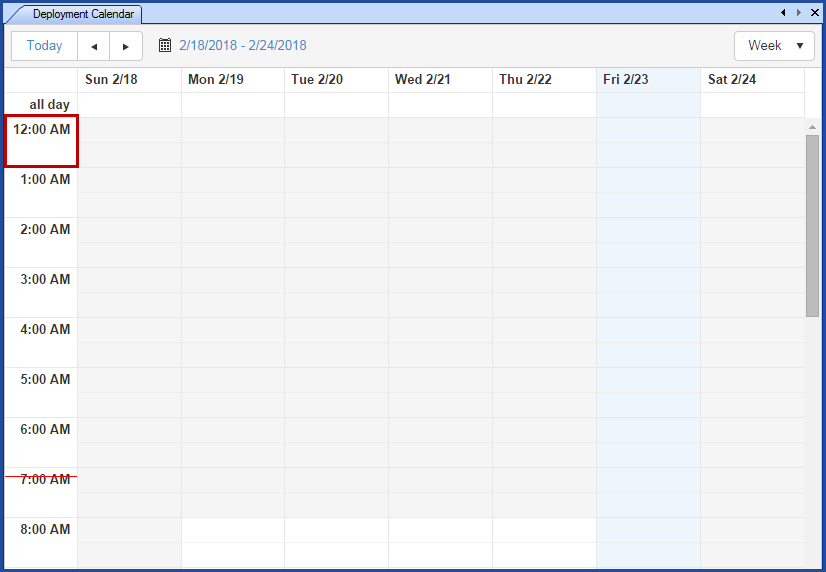
The Week view displays all deployments planned during the selected week.
Here is the information displayed:
- Week
- Date
- Time
- Impact colour
- Impacted service
- Subject of deployment task
- Assigned deployment group

Options for the Week View
By default, the week view of the deployment calendar shows the deployments from 7:00 to 00:00. As most deployments are done out of this range an option allows to modify the start time of the range.
For example to 00:00 in order to see 24 hours at a time.
It is also possible to choose the end time visible in the calendar.
Contact us to modify the time range if required and mention the DeploymentCalendar.StartTime or DeploymentCalendar.EndTime option depending on whether you wish to change the start or end time.
Month
The Month view displays all deployments planned during the selected month.
Here is the information displayed:
- Month
- Impact colour
- Impacted service
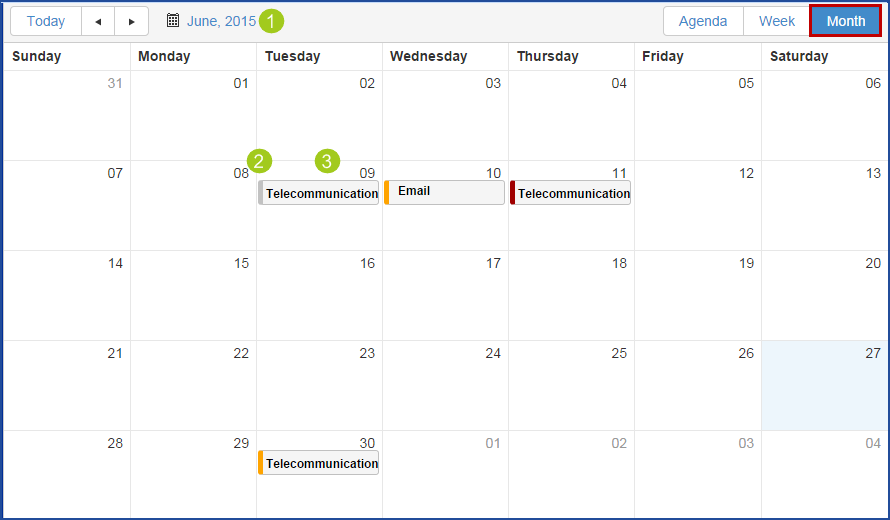
- Subject of deployment task
-
Assigned deployment group
Deployment History
The deployment calendar keeps a complete history of deployment tasks unless they have been deleted.
Deployment Calendar Configuration
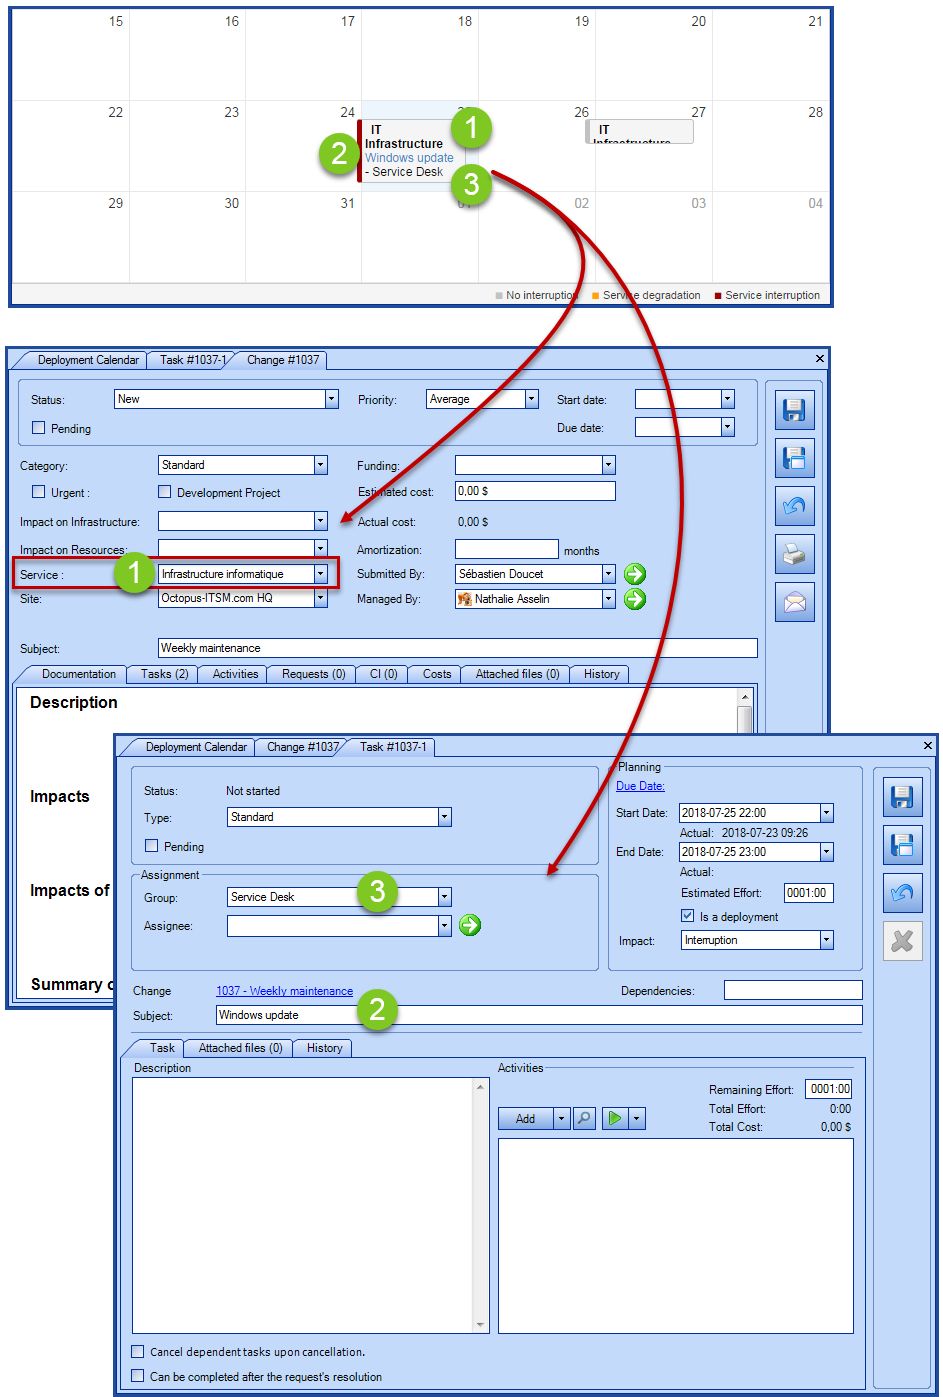
The default data that is visible in the deployment calendar is:
- The service selected in the change.
- The subject of the deployment task.
- The group assigned to the deployment task.
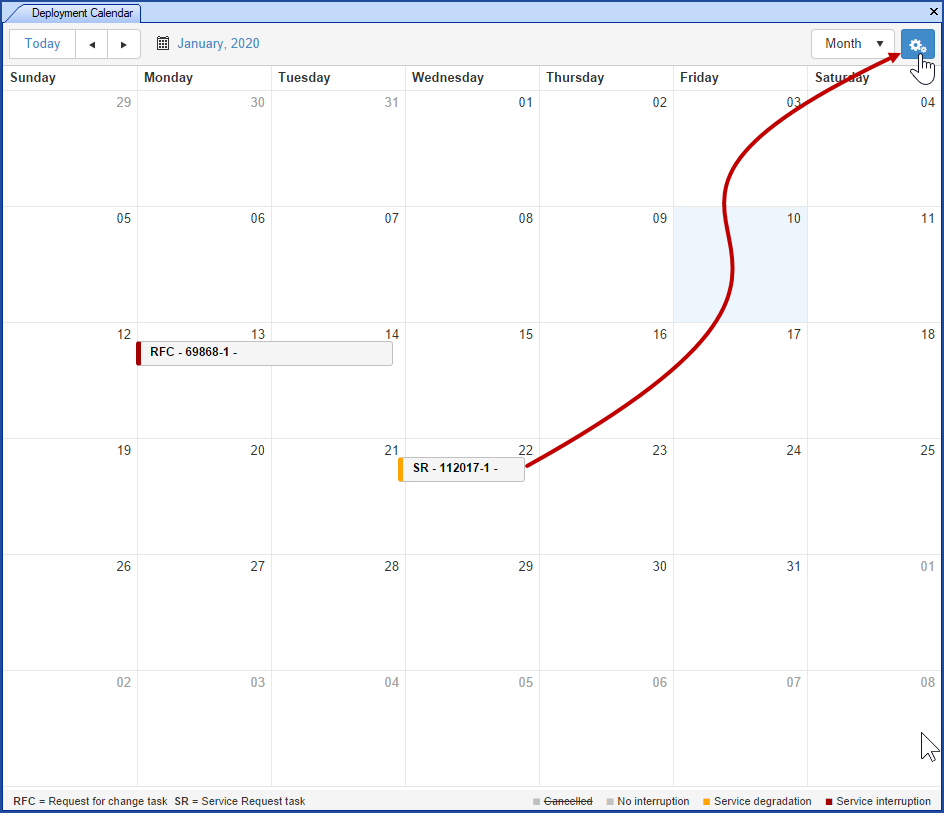
The variables can be changed using the configuration button at the top right of the calendar.

- Only an Octopus user with permission to administer Octopus can see the configuration button in the deployment calendar.
- The change affects all users in all of the calendar modes.
- To return to the default values in a section, just do CTRL + D.
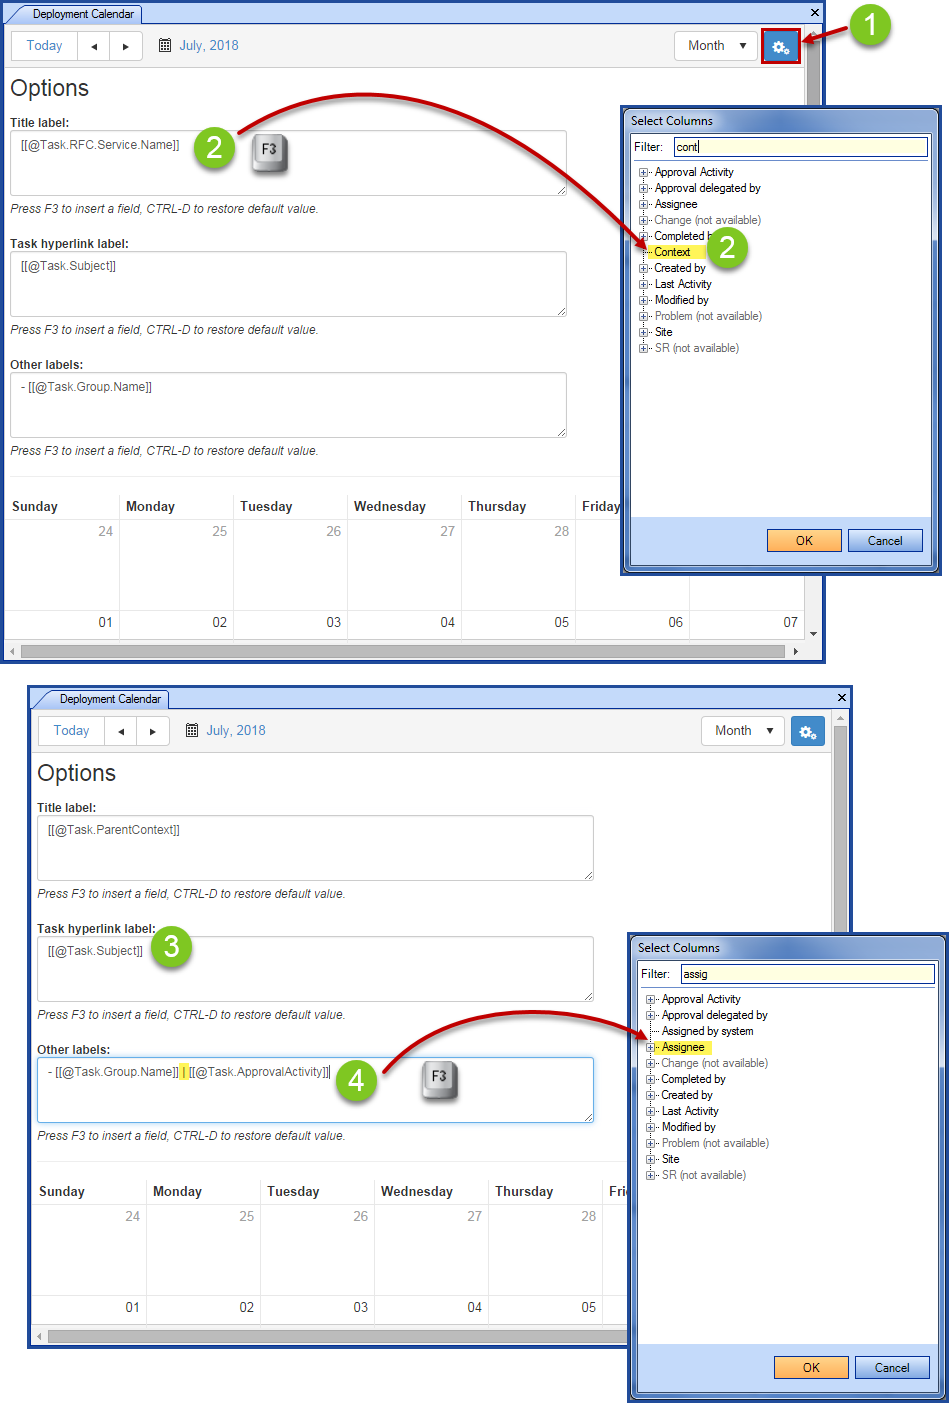
The button opens the 3 labels and allows to modify the display of elements in the calendar.
In our example, we do not use the Service field, so we will replace it with the name of the change that is represented in a task by the Context. Then we will add the Octopus user who is in charge of the task as well as the group.
Here are the steps:
- The Octopus administrator selects the configuration button.
- In the Title label, we replace the default variable with the context one using F3.
- We leave the Task hyperlink label section as is.
- In the Other labels section we will add a space, a pipe and the name of the Octopus user with F3.
- No saving is required, the modifications are automatically executed.
Visibility of SR Deployment Tasks
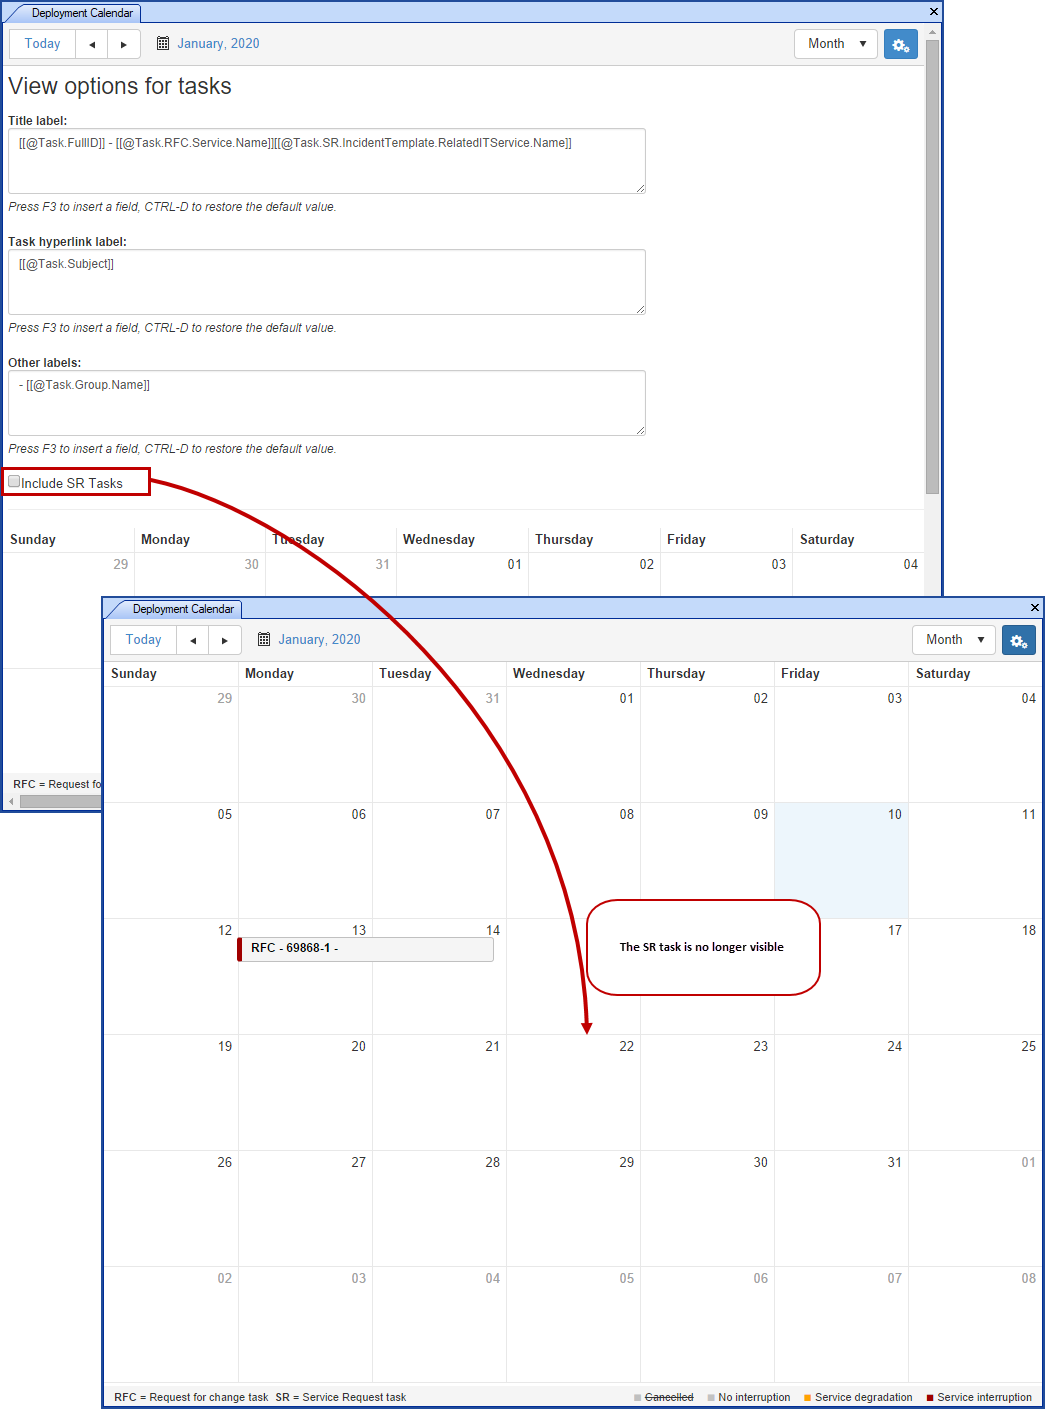
If the deployment tasks have been activated for the SRs, the Octopus users have the option of choosing to see these tasks in the calendar or not.
- From the Configuraiton section of the Deployment Calandar.
- Use the Include SR Tasks button to choose.
Thank you, your message has been sent.
